7. Repeat the same step 6 for the other row and that's all. You've completed the changes. May clear cache and browse your WordPress site now to check on it.
1. Go into the cPanel, look for the Databases section and click the phpmyadmin link.

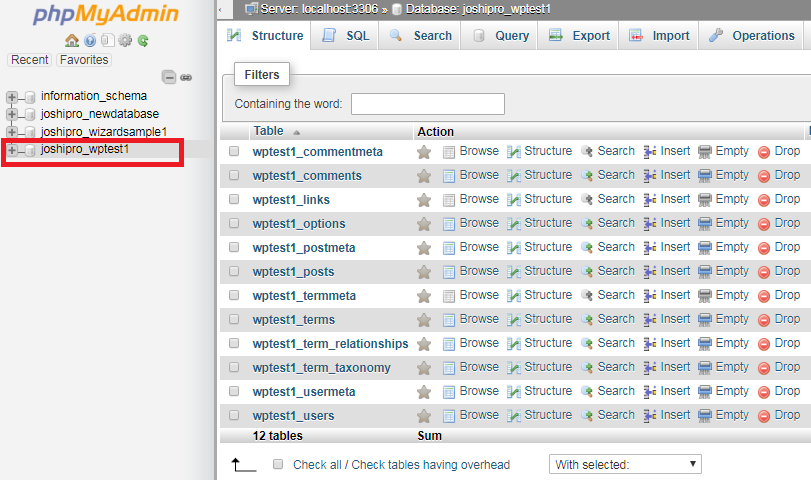
2. Select your WordPress database. (If you aren’t sure which database to select, check your wp-config.php file in the root location of your WordPress installation). In this example, I'm using my Wordpress database "joshipro_wptest1".

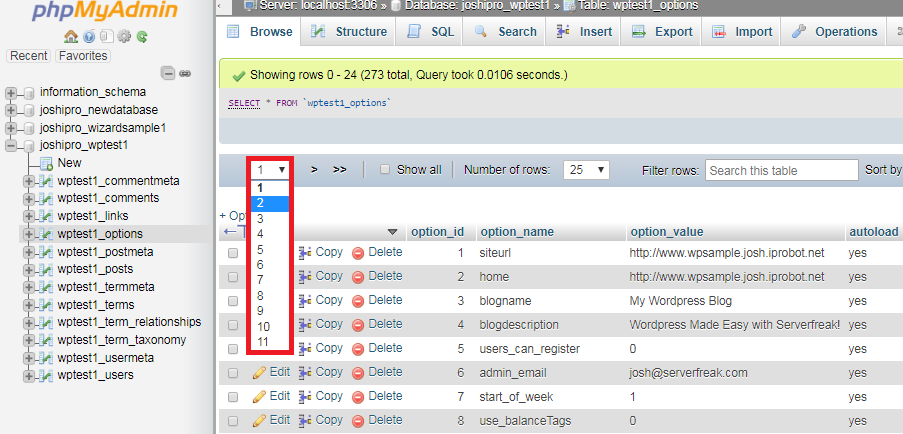
3. Expand the database and select the ‘wp_options’ table (if you have another table prefix ‘tableprefix_options’)
4. Select page 2 from the tables header.

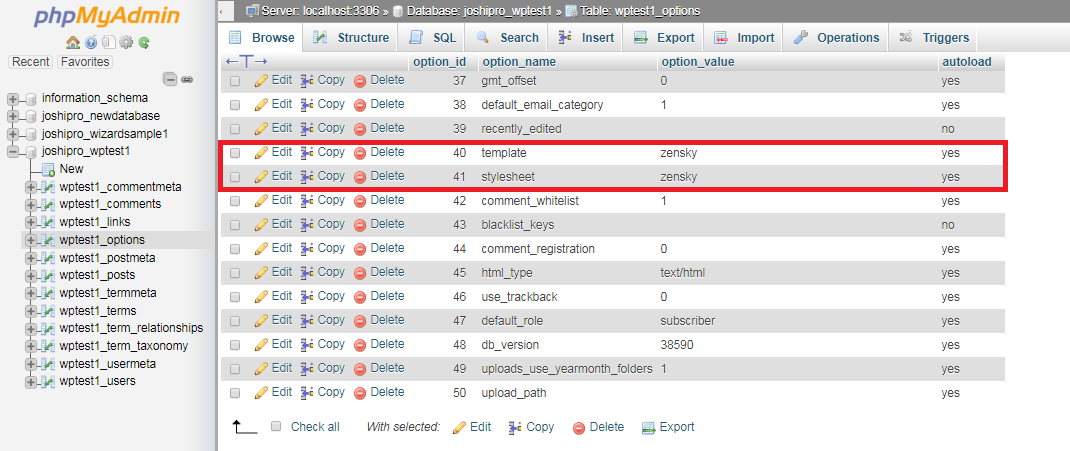
5. Now you’ll need to click 'Edit' to make change on the ‘template’ and ‘stylesheet’ rows.

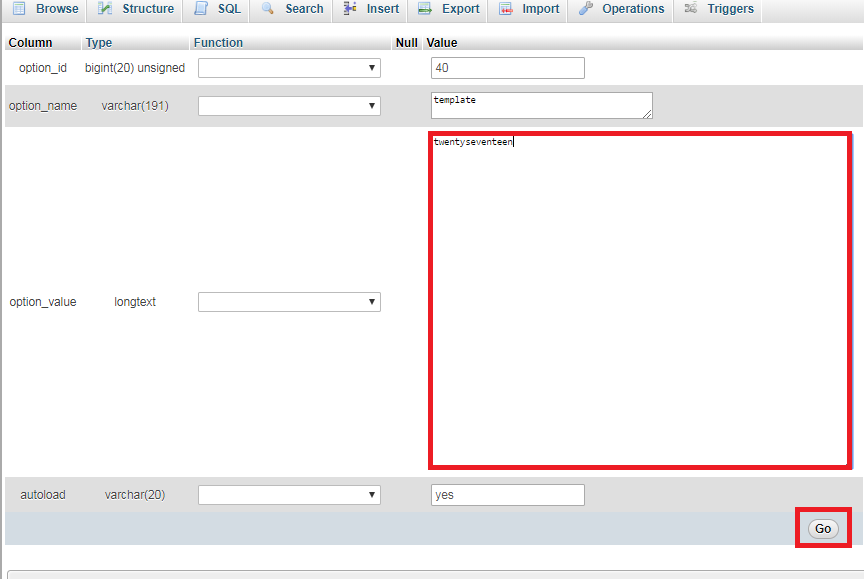
6. Insert in the name of the template you wish to assigned to the WordPress and press “Go” when you are done as per below.

7. Repeat the same step 6 for the other row and that's all. You've completed the changes. May clear cache and browse your WordPress site now to check on it.