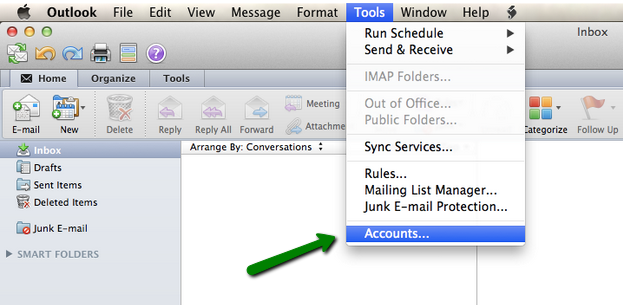
1) In order to create a new account, click on Tools tab > Accounts:

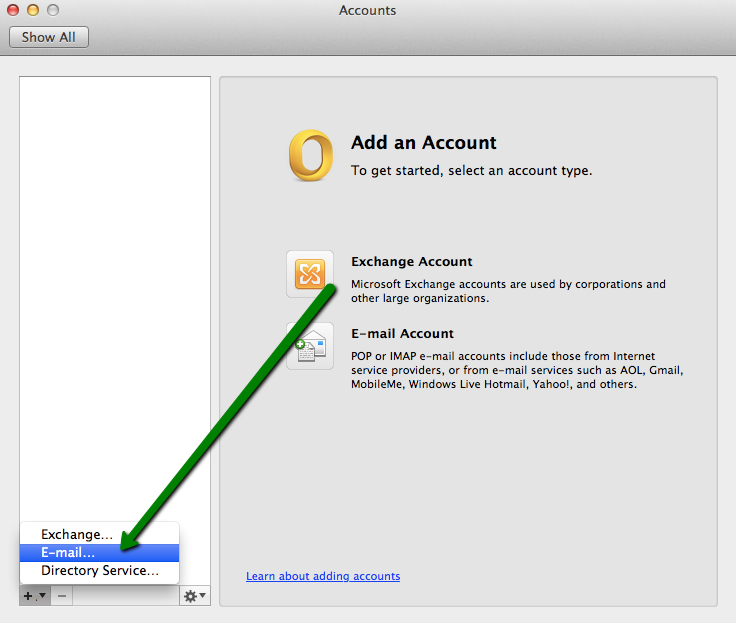
2) In the pop-up window, click on + in the lower left corner and select E-mail
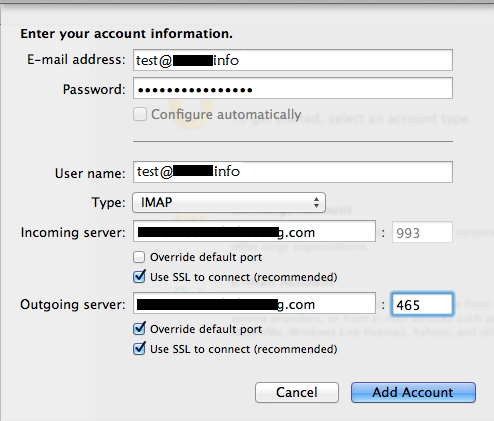
3) In the next window, enter a Private Email email address of yours.
Once you start entering your password, a configuration list will appear.
The settings should be as follows:
Username: Your email address
Type: IMAP or POP
Incoming server: the name of the server your hosting account is located on.
It can be obtained either in the welcome email in the section Account Information, or following the guide here
Use SSL to connect: this point is optional though recommended
After that, make sure that you are using correct port for incoming server according to the type of connection and presence of SSL specified before.
If necessary, click on Override default port and specify the needed one manually.
IMAP with SSL: port number 993
IMAP without SSL: port number 143
POP with SSL: port number 995
POP without SSL : port number 110
Outgoing server: the same as the incoming server
Again, usage of SSL is not mandatory, but recommended.
If you would like to use SSL for outgoing mail, set port to 465.
Without SSL, port number for outgoing connections should be either 26 or 587.
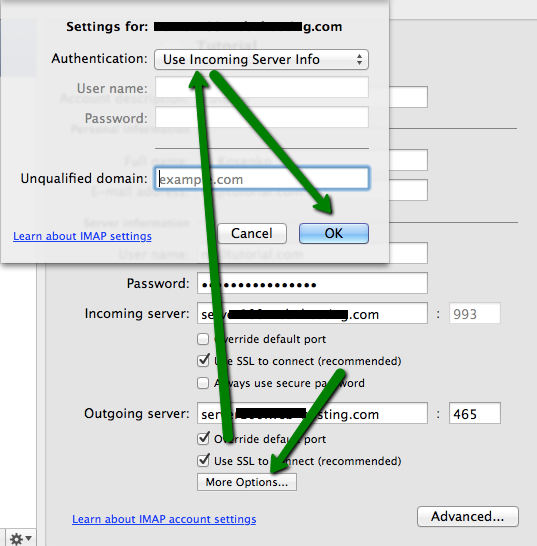
4) Upon clicking on Add Account, it will be necessary to enable SMTP authentication.
To do so, click on More options and specify Use Incoming Server Info in the drop-down menu for Authentication and click OK: 
5) Make sure that the option Always use secure password is unchecked.