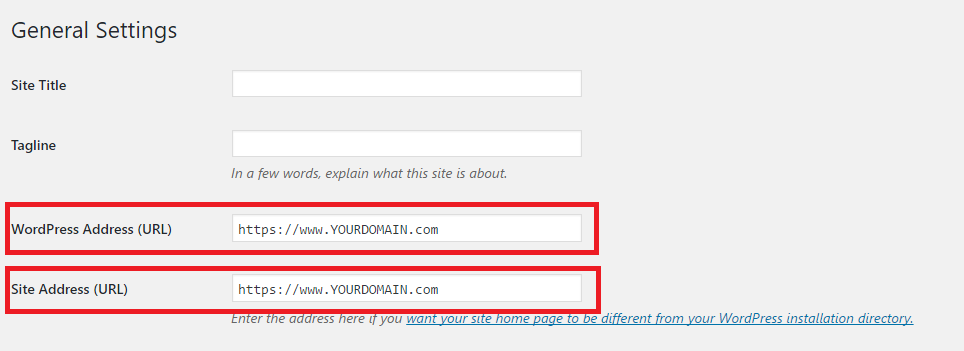
1) Login into WordPress admin dashboard e.g. http://yourdomainname.com/wp-admin
2) Select "Settings" -> "General".
3) Under WordPress Address (URL) and Site Address (URL) update user domain to https://www.yourdomain.com.
The page will be shown as below:

4) Press Save to save changes.
The final step is to open the .htaccess file and update it using the code below:
<IfModule mod_rewrite.c>
RewriteEngine On
RewriteCond %{SERVER_PORT} 80
RewriteRule ^(.*)$ https://www.YOURDOMAIN.com/$1 [R,L]
</IfModule>
NOTE: Please change YOURDOMAIN.com to user own domain. Example: For serverfreak.com, YOURDOMAIN.com will change to serverfreak.com.
Proceed to clear browser cache and browse the website as the WordPress webpage will automatically redirect with https:// connection page.
NOTE2: User might face "Not Secure" upon redirect to https:// webpage as it may seems there are some image or post link url might still referring to http://. Regarding this issue, user may alias with web developer to check on the connection or may search for WordPress plugins to fix the issue.
NOTE3: Hosting under Linux environment had been enabled with auto-SSL. For user under Windows, user will required to purchase SSL for the hosting.
* Kindly contact our technical support team if your current cPanel hosting plan does not have AutoSSL feature enabled.